
DIY Roof Inspection Tips Every Homeowner Should Know
- 1- Why Roof Inspections are Essential for Homeowners
- 2- When Should You Inspect Your Roof?
- 3- Essential Tools for DIY Roof Inspections
- 4- Key Areas to Check During Your Roof Inspection
- 5- Common Roof Issues to Watch For
- 6- When to Call a Professional Roofer
1- Why Roof Inspections are Essential for Homeowners
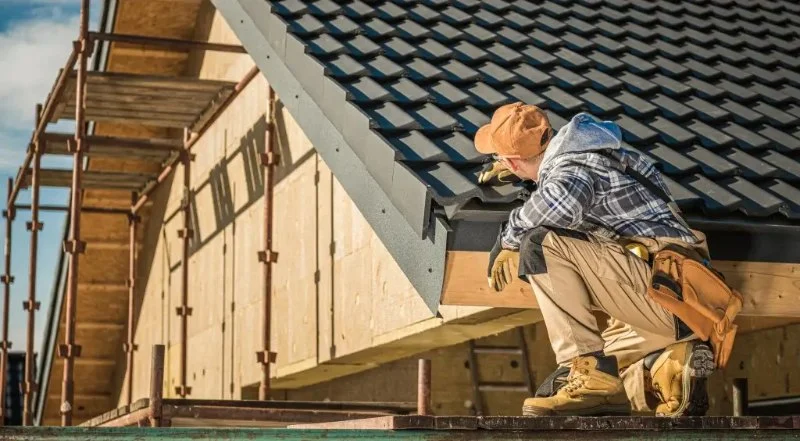
Regular roof inspections are crucial for homeowners to maintain the integrity of their homes. A well-maintained roof helps prevent costly damage from leaks, water intrusion, and structural issues. Performing DIY roof inspections not only saves money but also allows homeowners to spot problems early before they worsen. Roof maintenance can extend the lifespan of your roof, providing peace of mind and potentially increasing the value of your home.

Toitures Bernier et Fils / toitures bernier
QuébecCapitale-NationaleQuébec
1095 Chem. de la Canardière #4, Québec, QC G1J 2C2, Canada
2- When Should You Inspect Your Roof?
Homeowners should inspect their roof at least twice a year, ideally in the spring and fall. These inspections should also be done after severe weather events, such as storms, heavy rainfall, or strong winds, as these can cause significant damage to the roof. Regular checks ensure that small issues are identified early, preventing the need for expensive repairs later on.

3- Essential Tools for DIY Roof Inspections
Before you begin your DIY roof inspection, make sure you have the right tools. Some of the essential items include:
- Ladder: A sturdy ladder is necessary to safely access the roof.
- Flashlight: A flashlight will help you inspect dark areas, especially in the attic or under eaves.
- Binoculars: If you are unable to get on the roof, binoculars can help you spot damage from a distance.
- Notepad: Take notes on any issues you find during your inspection to keep track of repairs needed.
- Protective Gear: Wear gloves and non-slip footwear to ensure your safety while inspecting the roof.
4- Key Areas to Check During Your Roof Inspection
During a DIY roof inspection, focus on the following key areas:
- Shingles: Check for damaged, missing, or curled shingles, which can allow water to seep in.
- Flashing: Inspect the flashing around chimneys, vents, and skylights for signs of rust, cracks, or damage.
- Gutters: Ensure gutters are clear of debris and functioning properly to prevent water overflow.
- Roof Valleys: Check valleys where two roof slopes meet, as these areas are vulnerable to water buildup and leaks.
- Attic: Inspect the attic for signs of leaks or moisture, which can indicate roofing issues.
5- Common Roof Issues to Watch For
Here are some common roof problems you may encounter during your inspection:
- Leaks: Water stains on ceilings or walls often signal a roof leak.
- Pooling Water: Standing water in low areas of the roof can lead to sagging and damage.
- Granule Loss: Granules from asphalt shingles can indicate that your shingles are nearing the end of their lifespan.
- Moss or Algae Growth: Growth on the roof can trap moisture and cause deterioration over time.
6- When to Call a Professional Roofer
While many roof inspections and minor repairs can be done by homeowners, certain issues should be addressed by a professional roofer. If you spot major structural damage, extensive leaks, or problems that are out of your expertise, it’s best to call a licensed professional. They can provide a more thorough inspection and recommend the appropriate repairs to prevent further damage.
If you're in need of expert roofing services, visit Pickering Roofing for high-quality roofing solutions and professional advice.

 Ready Roofers5.0 (21 reviews)
 D'Angelo and Sons | Eavestrough and Roofing Vaughan4.0 (33 reviews)
 Jay Carter Roofing & Sheet Metal4.0 (50 reviews)
 Muskoka Roofing Company3.0 (19 reviews)
 SH Roofing Aluminum4.0 (8 reviews)
 Newmarket Roofing5.0 (1 reviews)
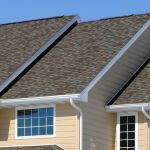 How Much Does a New Roof Cost in 2025? Canadian Roofing Price Guide
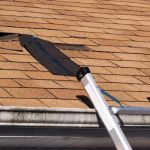 Top Signs Your Roof Has a Leak and What to Do About It in Canada
 Can You Install a New Roof Over an Old One in Canada?
 The Top Questions to Ask Before Hiring a Roofer in Canada
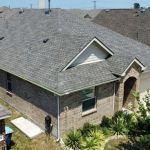 What Are the Most Common Roofing Scams and How to Avoid Them in Canada
 How to Prepare Your Home for a Roofing Project in Canada