
- 1. Why Sealing Roof Penetrations is Crucial
- 2. Common Roof Penetrations: Vents and Pipes
- 3. Steps to Effectively Seal Roof Penetrations
- 4. Tools and Materials Needed for Sealing
- 5. Common Mistakes to Avoid When Sealing Roof Penetrations
- 6. Real-Life Case Studies of Sealing Roof Penetrations
- 7. Expert Tips for Sealing Roof Penetrations
- 8. How Pickering Roofing Can Help You Seal Roof Penetrations
1. Why Sealing Roof Penetrations is Crucial
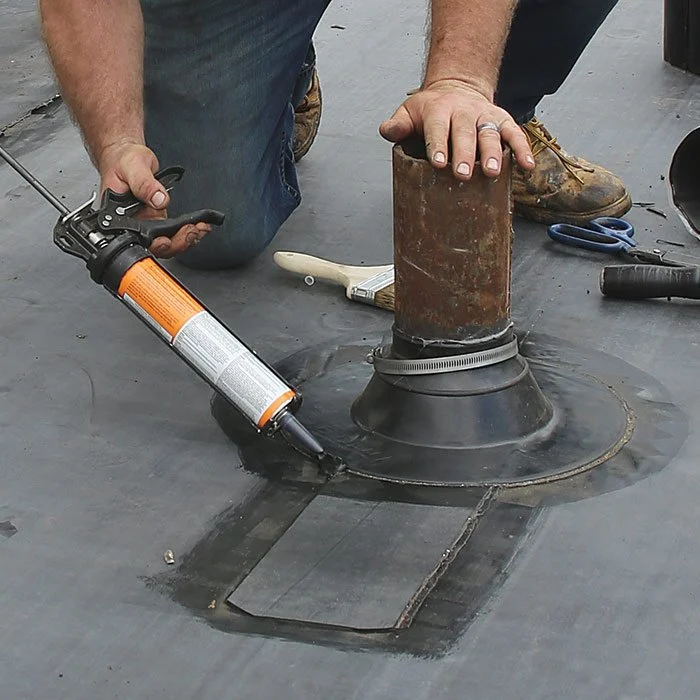
When it comes to maintaining your roof, sealing penetrations such as vents and pipes is one of the most important tasks. Roof penetrations are potential weak spots where water can easily enter, leading to leaks and water damage inside your home. Not only can this cause structural damage, but it can also lead to costly repairs. Ensuring these areas are properly sealed protects your roof’s integrity and helps prevent expensive damage in the long run.
SGM Construction Roofing / sgmconstruction.ca
287 Epsom Downs Dr, North York, ON M3M 1T5, Canada
2. Common Roof Penetrations: Vents and Pipes
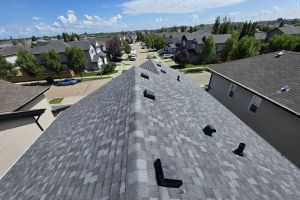
Roof penetrations come in many forms, with vents and pipes being among the most common. Vents are necessary for proper attic ventilation, while pipes are essential for plumbing systems. However, both create openings in the roof where water can seep in. These penetrations are especially vulnerable to weather elements, which makes it crucial to seal them effectively. Over time, the seals around these penetrations may wear out, causing the risk of leaks to increase.
Advanced Level Roofing / advanced level roofing winnipeg
1549 St Mary's Rd #101, Winnipeg, MB R2M 5G9, Canada
3. Steps to Effectively Seal Roof Penetrations
Properly sealing roof penetrations involves several key steps to ensure a secure and long-lasting seal:
- Step 1: Inspect the Area – Begin by carefully inspecting the roof around vents, pipes, and any other penetrations for signs of wear, cracks, or gaps.
- Step 2: Clean the Surface – Clean the area around the penetration to ensure the sealant will adhere properly. Remove debris, dirt, or any old sealant that may be in place.
- Step 3: Apply a Quality Sealant – Use a high-quality, weather-resistant roofing sealant. Be sure to apply it evenly around the base of the vent or pipe.
- Step 4: Smooth the Sealant – Once applied, smooth the sealant with a putty knife or caulking tool to ensure it forms a tight, even seal.
- Step 5: Allow Proper Drying Time – Let the sealant dry completely according to the manufacturer's instructions before exposing the area to weather conditions.
4. Tools and Materials Needed for Sealing
To seal roof penetrations properly, you will need the following tools and materials:
- Roofing sealant or caulk (weather-resistant)
- Putty knife or caulking tool
- Utility knife for removing old sealant
- Cleaning supplies (soap, water, rags)
- Ladder or scaffolding for safe access to the roof
- Protective gloves and goggles for safety
5. Common Mistakes to Avoid When Sealing Roof Penetrations
When sealing roof penetrations, avoid these common mistakes that could compromise the effectiveness of your seal:
- Overusing Sealant: Applying too much sealant can lead to a messy finish and may not create the most effective barrier against leaks.
- Using Low-Quality Materials: Cheap or incorrect sealants may degrade quickly, leading to leaks and the need for frequent reapplication.
- Neglecting to Clean the Surface: Failing to clean the area before applying sealant can result in poor adhesion and premature failure of the seal.
- Ignoring Regular Inspections: Even after sealing, it's important to inspect the areas periodically to ensure the seal remains intact over time.
6. Real-Life Case Studies of Sealing Roof Penetrations
Many homeowners have faced issues with roof leaks caused by improperly sealed penetrations. One case involved a homeowner in Pickering whose attic was experiencing water damage during every rainfall. Upon inspection, it was found that the roof vent had a cracked seal. After applying a high-quality roofing sealant, the leaks stopped, saving the homeowner thousands in potential repair costs.
7. Expert Tips for Sealing Roof Penetrations
For the best results, consider these expert tips:
- Always use a roofing sealant designed for your climate to ensure the longevity of your seal.
- For areas with heavy rain or snow, consider adding extra layers of sealant for increased protection.
- If you're unsure about doing the job yourself, consider consulting a professional roofer to ensure the job is done right.
8. How Pickering Roofing Can Help You Seal Roof Penetrations
If you want to ensure your roof penetrations are sealed correctly, Pickering Roofing is here to help. Our team of experts can inspect your roof, identify any potential issues, and apply long-lasting solutions that will keep your home dry and secure. Whether you need help sealing vents, pipes, or any other roof penetration, we have the tools, expertise, and experience to get the job done right.

 Blackstar Aluminum Ltd4.0 (204 reviews)
 FIVE STAR ROOFING CORP5.0 (1 reviews)
 Metal Roof Repair & Waterproofing5.0 (2 reviews)
 Artisan Metal Roofing5.0 (8 reviews)
 Crown Roofing LTD4.0 (125 reviews)
 Zega Roofing4.0 (55 reviews)
 How Much Does a New Roof Cost in 2025? Canadian Roofing Price Guide
 Top Signs Your Roof Has a Leak and What to Do About It in Canada
 Can You Install a New Roof Over an Old One in Canada?
 The Top Questions to Ask Before Hiring a Roofer in Canada
 What Are the Most Common Roofing Scams and How to Avoid Them in Canada
 How to Prepare Your Home for a Roofing Project in Canada