
DIY Roof Inspection Tips Every Homeowner Should Know
- 1- Introduction: Why Roof Inspections Are Important
- 2- Tools You Need for a Roof Inspection
- 3- DIY Roof Inspection Checklist
- 4- Common Roof Problems to Look Out For
- 5- Safety Tips for Inspecting Your Roof
- 6- When to Call a Professional Roofer
1- Introduction: Why Roof Inspections Are Important
As a homeowner, taking care of your roof is crucial for the long-term health of your home. Regular roof inspections can help you identify potential issues early, preventing costly repairs down the road. Performing your own roof inspection is an excellent way to stay on top of maintenance, even if you don’t have extensive roofing experience. This article will guide you through the process of inspecting your roof yourself and recognizing the signs of damage before they turn into major problems.
Flynn Canada Ltd. - Ottawa / flynn ottawa
1655 Comstock Rd, Gloucester, ON K1B 5L2, Canada
2- Tools You Need for a Roof Inspection
Before you start your roof inspection, you’ll need to gather a few essential tools. Having the right equipment will make the process safer and more efficient. Here's a list of basic tools you should have on hand:
Ck Roofing Solutions / ck roofing solutions
MarkhamRegional Municipality of YorkOntario
8 Hikers Ln, Markham, ON L6B 0K3, Canada
2.1- Ladder
A sturdy ladder is essential for accessing your roof safely. Make sure your ladder is in good condition, and always place it on stable, level ground.
2.2- Flashlight
If you need to check your attic for leaks or signs of damage, a flashlight is essential. This will help you see into dark corners and spots that may otherwise go unnoticed.
2.3- Binoculars
If you're unable to get onto your roof, binoculars can help you get a closer look at the roof's condition from the ground. This is especially useful for inspecting the shingles or any other high-up areas.
2.4- Work Gloves and Safety Gear
Safety should always come first. Wear work gloves to protect your hands from sharp edges and debris. If you're going up on the roof, consider wearing a safety harness and non-slip shoes.
3- DIY Roof Inspection Checklist
Now that you have the right tools, it’s time to inspect your roof. Follow this comprehensive checklist to ensure you cover all important aspects of the roof's condition.
3.1- Check for Missing, Damaged, or Curling Shingles
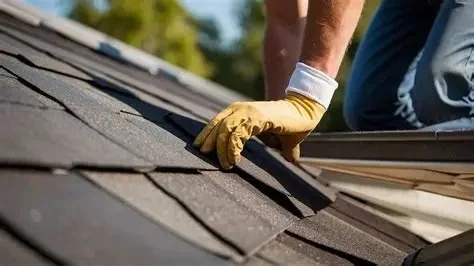
Shingles are the first line of defense against the elements. Inspect them for any signs of wear, curling, cracking, or missing pieces. Damaged shingles should be replaced to prevent leaks.
3.2- Examine Roof Valleys
Roof valleys are areas where two roof slopes meet, making them more susceptible to leaks. Ensure that these areas are clear of debris and check for any signs of damage or wear.
3.3- Inspect Flashing Around Vents and Chimneys
Flashing is the material used to seal joints around chimneys, vents, and skylights. Look for rust, cracks, or gaps in the flashing, as these are common entry points for water.
3.4- Look for Moss, Algae, or Lichen Growth
Moss, algae, and lichen can trap moisture against the roof, which can lead to decay and damage over time. If you see these growths, it's important to clean the roof properly.
3.5- Check Gutters and Downspouts
Clogged gutters can cause water to back up onto the roof, which leads to leaks and water damage. Ensure that your gutters are clear of debris and functioning properly.
4- Common Roof Problems to Look Out For
During your inspection, there are a few common roof problems that homeowners should be aware of. Recognizing these issues early can save you from costly repairs.
4.1- Roof Leaks
Leaks are one of the most common roof problems. Check your attic for signs of water stains or moisture. If you notice a leak, it's crucial to get it repaired as soon as possible to avoid further damage.
4.2- Water Damage or Staining
Water stains on your ceiling or walls may indicate a roof leak. If you find these stains, trace the source of the water to the roof to fix the issue.
4.3- Loose or Damaged Flashing
Flashing can become loose or cracked over time, especially in areas around chimneys, skylights, and vents. This can lead to water intrusion, so it's important to check and repair flashing as needed.
5- Safety Tips for Inspecting Your Roof
Roof inspections can be dangerous, especially if you’re not used to working at heights. Keep the following safety tips in mind when inspecting your roof:
5.1- Use Proper Ladder Safety
Ensure your ladder is set up correctly. Place it on a flat, stable surface, and never lean too far to one side when climbing. Always maintain three points of contact with the ladder.
5.2- Don’t Work Alone
If possible, have someone with you when inspecting the roof. This provides an extra layer of safety in case of an emergency.
5.3- Avoid Roof Work in Inclement Weather
Avoid inspecting or repairing your roof in wet, windy, or icy conditions. This can increase your risk of slipping or falling.
6- When to Call a Professional Roofer
While DIY roof inspections can help identify potential problems, some issues may require a professional roofer. It’s important to call a professional when:
6.1- You Find Significant Damage
If you notice significant damage, such as widespread missing shingles or large leaks, it’s time to call a professional. Roof repairs or replacements require specialized knowledge and tools.
6.2- You’re Uncomfortable on the Roof
If you're not comfortable climbing onto your roof or feel unsafe at any point, it’s best to hire a professional. Roofers have the proper equipment and training to perform the job safely.
6.3- After Major Storms
If your area has recently experienced a severe storm, it’s wise to have a professional inspect your roof for any hidden damage. Strong winds and heavy rain can cause damage that’s difficult to spot on your own.
For a reliable roofing service, visit Pickering Roofing for expert solutions and recommendations.

 Innovation Roofing ltd5.0 (11 reviews)
 Roy Dennis Roofing4.0 (42 reviews)
 Awash Roofing4.0 (4 reviews)
 Best Quality Roofing Works Inc5.0 (4 reviews)
 Mr. Roofing & Siding5.0 (7 reviews)
 H&R Roofing3.0 (7 reviews)
 How Much Does a New Roof Cost in 2025? Canadian Roofing Price Guide
 Top Signs Your Roof Has a Leak and What to Do About It in Canada
 Can You Install a New Roof Over an Old One in Canada?
 The Top Questions to Ask Before Hiring a Roofer in Canada
 What Are the Most Common Roofing Scams and How to Avoid Them in Canada
 How to Prepare Your Home for a Roofing Project in Canada