
- Why Sealing Roof Valleys is Important
- Steps to Seal Roof Valleys Properly
- Tools and Materials Needed
- Common Mistakes to Avoid When Sealing Roof Valleys
- How to Prevent Future Water Leakage in Roof Valleys
1. Why Sealing Roof Valleys is Important
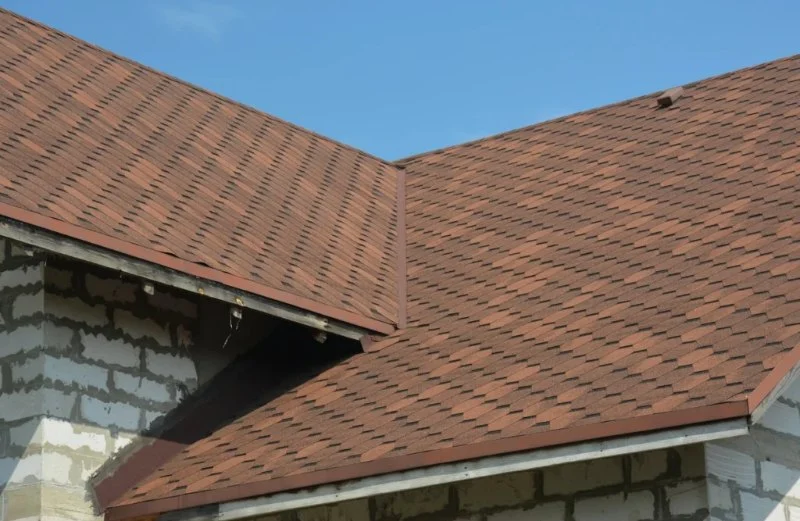
Roof valleys are one of the most vulnerable parts of your roof when it comes to water leakage. These areas, where two roof slopes meet, are designed to direct rainwater away from your roof, but they can also be prone to damage and water accumulation if not properly sealed. Water can seep into unsealed valleys, leading to leaks inside the home, water damage to the ceiling, walls, and even structural issues if left unchecked.
In Canada, where heavy rainfall and snow can strain roofing systems, sealing your roof valleys properly is crucial to protecting your home from water damage. Neglecting this step can lead to expensive repairs and ongoing moisture issues. By ensuring that your roof valleys are properly sealed, you are proactively preventing potential leaks and extending the lifespan of your roof.

J.R. Trory & Company Ltd / burrard roofing & drainage
North VancouverMetro VancouverBritish Columbia
1443 Crown St, North Vancouver, BC V7J 1G4, Canada
2. Steps to Seal Roof Valleys Properly
Sealing roof valleys is a process that requires careful attention and the right materials to ensure that water flows away from the roof properly without causing leaks. Here’s how you can properly seal roof valleys to prevent water leakage:
1. Inspect the Roof Valleys
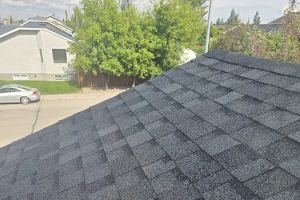
Before starting, it’s essential to inspect the roof valleys for any visible damage, such as cracked shingles, rusted flashing, or accumulated debris. Make sure the valleys are free from leaves, twigs, or dirt that could block the flow of water. If the flashing is damaged or missing, it needs to be replaced before proceeding with the sealing.
2. Clean the Area
Clean the roof valley thoroughly using a broom or pressure washer to remove any debris, dirt, or old sealant. This step is crucial for ensuring that the new sealant adheres properly to the surface. Make sure to dry the area completely after cleaning to prevent trapping moisture underneath the new sealant.
3. Apply Roofing Cement or Sealant
Apply a generous amount of roofing cement or a high-quality roof sealant along the edges of the roof valley. Be sure to use a sealant specifically designed for roofing purposes to withstand the elements. Apply the product in a continuous, even layer, ensuring it covers all the seams and edges of the valley.
4. Install New Flashing (if Necessary)
If the existing flashing is damaged or ineffective, it’s important to install new flashing before sealing the valley. Flashing helps direct water away from the roof structure and prevents water from seeping into the roof. Secure the flashing tightly along the edges of the valley, ensuring there are no gaps or openings for water to infiltrate.
5. Seal the Shingles
After applying the sealant, ensure that the shingles around the valley are securely fastened and sealed. You can apply roofing cement underneath the shingles to seal any gaps between them and the valley. This will help prevent water from seeping into the roof system through the edges of the shingles.
6. Let the Sealant Cure
Allow the sealant or roofing cement to cure completely before exposing it to rain or snow. Follow the manufacturer’s instructions for curing time, as applying pressure or water too soon can compromise the effectiveness of the seal.
3. Tools and Materials Needed
To successfully seal roof valleys, you’ll need the following tools and materials:
- Roofing sealant or cement
- Replacement flashing (if necessary)
- Roofing nails or staples
- Broom or pressure washer for cleaning
- Protective gloves and safety goggles
- Ladder or scaffolding for accessing the roof safely
- Putty knife or trowel for applying roofing cement
Having the right tools ensures that the sealing process is done efficiently and effectively, helping you avoid future leaks and water damage.
4. Common Mistakes to Avoid When Sealing Roof Valleys
Sealing roof valleys is a straightforward process, but there are a few common mistakes that can lead to ineffective results or even more serious issues down the road:
- Not Cleaning the Area Thoroughly: Failing to clean the valley and surrounding areas can prevent the sealant from adhering properly, leading to future leaks.
- Using the Wrong Sealant: Not all sealants are created equal. Be sure to use a high-quality, weather-resistant roof sealant specifically designed for the task.
- Neglecting to Replace Damaged Flashing: If the flashing is damaged, it needs to be replaced before sealing the valley. Ignoring this step can lead to water seepage and long-term damage.
- Rushing the Curing Process: Allow the sealant to fully cure before exposing it to moisture. Rushing this step can weaken the seal and lead to water infiltration.
5. How to Prevent Future Water Leakage in Roof Valleys
Once you’ve sealed the roof valleys, it’s essential to maintain the sealant and keep the valleys clear of debris to prevent future water leakage. Here are some proactive steps you can take:
- Regular Inspections: Check your roof valleys at least twice a year, especially after heavy storms, to ensure that the sealant remains intact and there’s no debris buildup.
- Clean Gutters and Downspouts: Keeping your gutters and downspouts clear ensures proper water flow and prevents overflow that could damage your roof valleys.
- Apply Additional Sealant as Needed: Over time, the sealant can wear away. Reapply sealant as necessary to maintain a strong barrier against water.
For expert advice and top-quality roofing materials, check out Pickering Roofing for everything you need to protect your roof and prevent future water damage.


 Woodpecker Roofing Inc.4.0 (21 reviews)
 Y Laramée Couvreur Inc4.0 (48 reviews)
 T-CON METAL SYSTEMS3.0 (6 reviews)
 Noor roofing5.0 (4 reviews)
 A & A Roofing (2016) Ltd2.0 (1 reviews)
 Mason Roofing, Superior Roofing Since 19214.0 (2 reviews)
 How Much Does a New Roof Cost in 2025? Canadian Roofing Price Guide
 Top Signs Your Roof Has a Leak and What to Do About It in Canada
 Can You Install a New Roof Over an Old One in Canada?
 The Top Questions to Ask Before Hiring a Roofer in Canada
 What Are the Most Common Roofing Scams and How to Avoid Them in Canada
 How to Prepare Your Home for a Roofing Project in Canada